5 – How to Customise the Router-PT in Packet Tracer#
This guide shows you how to customise a Router-PT or Router-PT-Empty device in Cisco Packet Tracer by adding or removing network interface modules.
Customising routers lets you choose the exact combination of Ethernet, Serial, and other ports required for your topology.
Part 1 – Accessing the Physical Configuration#
Select a Router-PT or Router-PT-Empty from the device list and drag it into the workspace.
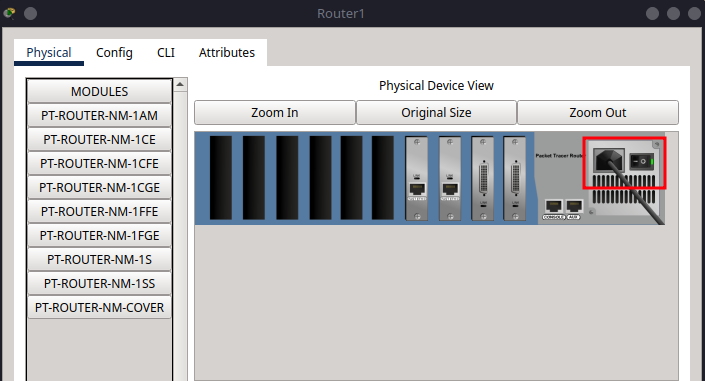
Click the router to open its configuration window.
Go to the Physical tab.
Part 2 – Powering Off Before Modifying#
Before making hardware changes:
Click the power button (top left corner of the router image).
Wait until the green light turns off, this ensures safe module installation.
Part 3 – Adding or Removing Modules#
In the module pane (left side), locate the module you need.
Drag the module into an empty slot on the router.
Modules must be installed from right to left.
To remove a module:
Click and drag it out of the router slot while powered off.
Part 4 – Powering On#
Once your modules are installed:
Click the power button again to turn the router back on.
The green light will return, and the added interfaces will become available in the CLI and config tabs.
Part 5 – Common Router-PT Modules#
Below is a table listing commonly used modules you’ll find in the module selection pane:
Module Name |
Description |
Interface Type |
|---|---|---|
|
Analog Modem Module |
Modem |
|
Coaxial Ethernet |
Ethernet (Coax) |
|
1-Port FastEthernet |
FastEthernet |
|
1-Port GigabitEthernet |
GigabitEthernet |
|
1-Port FastEthernet (Fiber) |
FastEthernet (FX) |
|
1-Port GigabitEthernet (Fiber) |
Gigabit (FX) |
|
1-Port Serial |
Serial |
|
1-Port Smart Serial |
Smart Serial |
|
Blank cover slot (no interface) |
N/A |