Decrypt HTTPS Traffic in Wireshark On Ubuntu Linux#
Being able to inspect HTTPS traffic in Wireshark is extremely useful when you’re debugging APIs, analysing website behaviour, or learning how network protocols work behind the scenes. This guide walks through how to decrypt HTTPS traffic in Wireshark on Ubuntu using the SSLKEYLOGFILE method, no need for certificates or proxy setups.
Handy Tip
While this tutorial is focused on Ubuntu, the same steps apply to other Linux distributions like Debian, Fedora, and Arch Linux. The commands may vary slightly based on your package manager when it comes to installing Wireshark or Google Chrome, but the overall process remains the same.
Part 1: Setting Up the SSLKEYLOGFILE Environment Variable#
To enable HTTPS decryption, you need to set the SSLKEYLOGFILE environment variable so supported browsers can log TLS keys. There are two main ways to do this:
Method 1 – Temporary (Current Terminal Only)#
Set the environment variable for just your current terminal session. This is quick and doesn’t affect other terminals or future sessions.
export SSLKEYLOGFILE=~/.ssl-key.log

After running this command, any browser launched from this terminal will log TLS keys to ~/.ssl-key.log. The variable will be unset when you close the terminal.
Pros:
No permanent changes to your system.
Good for quick, one-off debugging.
Cons:
You must set it every time you open a new terminal.
Only affects programs launched from that terminal session.
Method 2 – Permanent (All Future Terminals)#
Add the environment variable to your shell configuration file (e.g., .bashrc) so it’s set automatically for all future terminal sessions.
Note on bash vs zsh
Here we assume you are using bash. If you use zsh, replace .bashrc with .zshrc in the instructions below. It will work the same way.
Open your .bashrc file:

nano ~/.bashrc
Scroll to the bottom and add:
export SSLKEYLOGFILE=~/.ssl-key.log
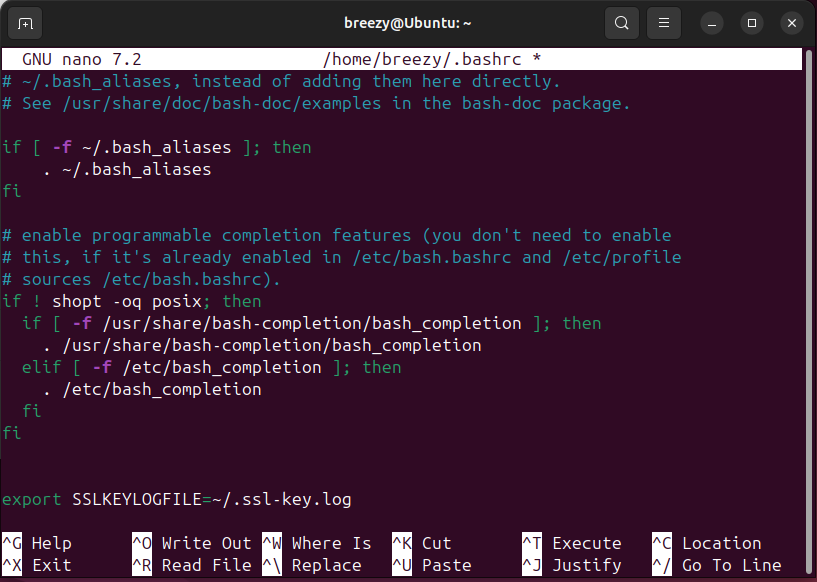
Save and exit (CTRL + O, then CTRL + X). Then apply the changes with:
source ~/.bashrc
You can confirm it’s set by running:
echo $SSLKEYLOGFILE
You should see the correct file path printed.

Pros:
Automatically set in every new terminal.
No need to remember to set it each time.
Cons:
Affects all terminal sessions (may not always be desirable).
Slightly more setup required.
Choose the method that best fits your workflow. For most users, the permanent method is more convenient, but the temporary method is useful for quick tests or if you don’t want to modify your shell configuration.
Part 2: Configuring Your Browser to Log SSL Keys#
Now we need a browser that supports TLS key logging. Note that Firefox on Linux no longer supports this method by default, so you’ll need to use Chromium or Google Chrome.
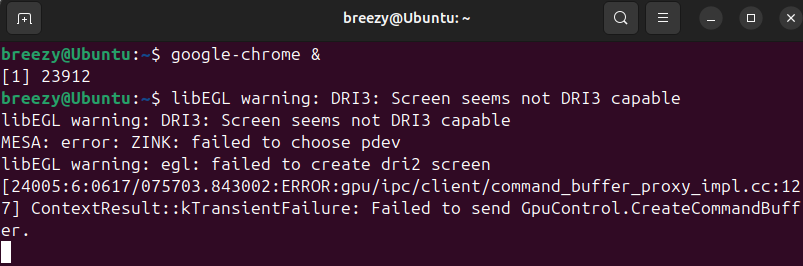
Important: If you’re using Chromium or Chrome from Snap or Flatpak, this likely won’t work, they are sandboxed and cannot write to external files like ~/.ssl-key.log.
To avoid this, install the .deb version of Chrome:
wget https://dl.google.com/linux/direct/google-chrome-stable_current_amd64.deb
sudo apt install ./google-chrome-stable_current_amd64.deb
Once installed, you need to launch Chrome from a terminal so it inherits the environment variable.
If you used Method 1 (Temporary):
Before launching Chrome, make sure to set the environment variable again in your current terminal session:export SSLKEYLOGFILE=~/.ssl-key.log
Then start Chrome:
google-chrome &
If you used Method 2 (Permanent):
You can simply run:google-chrome &
The environment variable will already be set in all new terminals.
Important Note on Snap/Flatpak Versions#
If you try to use Chromium installed via Snap, you’ll likely see an error stating that it couldn’t open the SSL key log file.

To avoid this, ensure you are using the .deb version of Google Chrome as described above. The Snap and Flatpak versions do not support writing to the SSLKEYLOGFILE due to sandboxing restrictions.
Note for other Linux Distributions
You’ll face similar issues with Snap or Flatpak versions on other distributions as well. Always prefer the .deb or native package version of Chrome for this purpose. For example, on Fedora, use the .rpm package instead, and on Arch Linux, use the AUR package for Google Chrome.
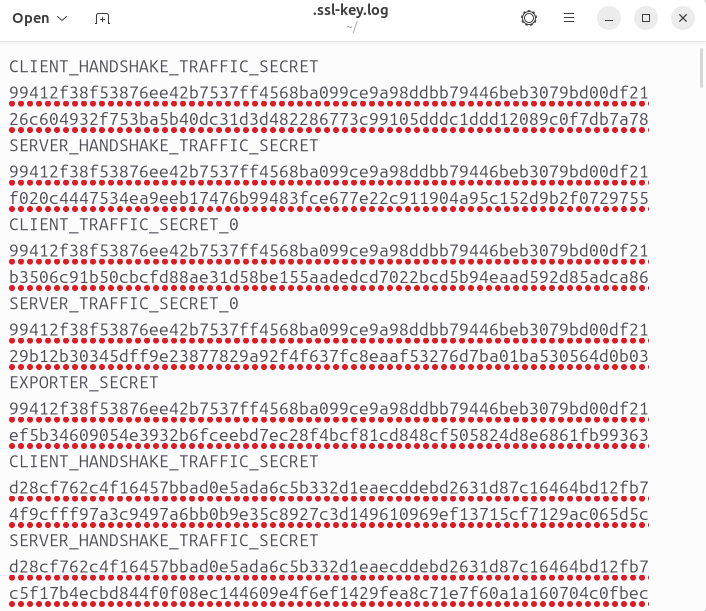
Testing the SSL Key Log File#
When Chrome is working correctly, visiting a few HTTPS websites will cause the .ssl-key.log file to populate. You can check this by running:
cat ~/.ssl-key.log
Or by opening the file in a text editor. You should see lines like this:
Part 3: Configuring Wireshark to Use the SSL Key Log File#
Now we’ll configure Wireshark to use the SSL key log file.
Open Wireshark
Go to
Edit→PreferencesNavigate to
Protocols→TLSSet the (Pre)-Master-Secret log filename to (make sure to change to your username):
/home/breezy/.ssl-key.log
If you’re using the file browser to locate it, make sure to enable “Show hidden files” so .ssl-key.log is visible.
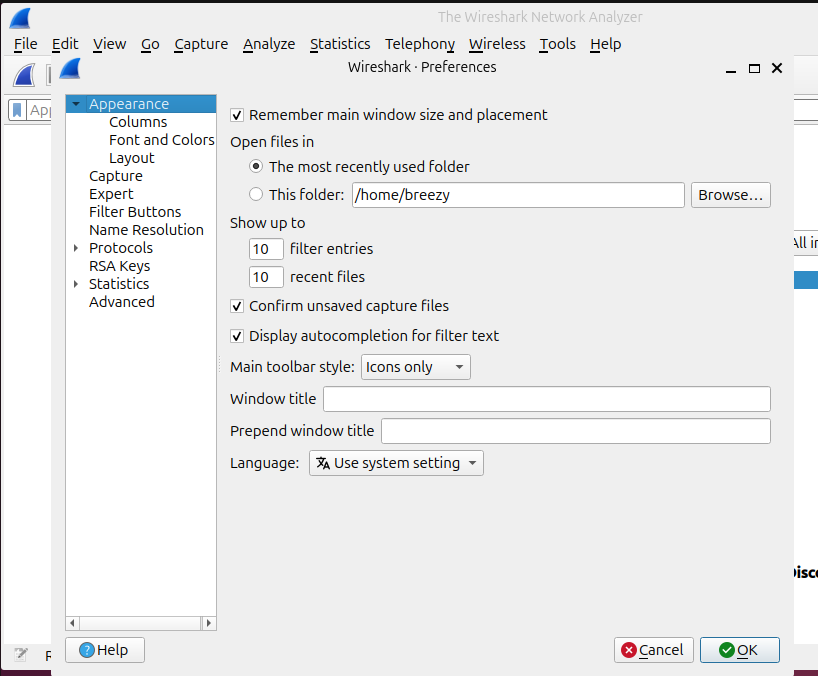
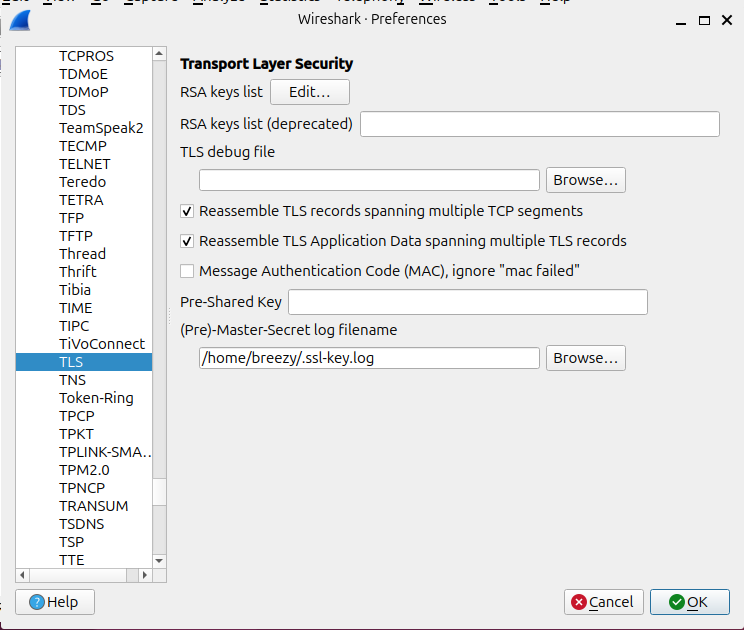
Click OK to save the changes.
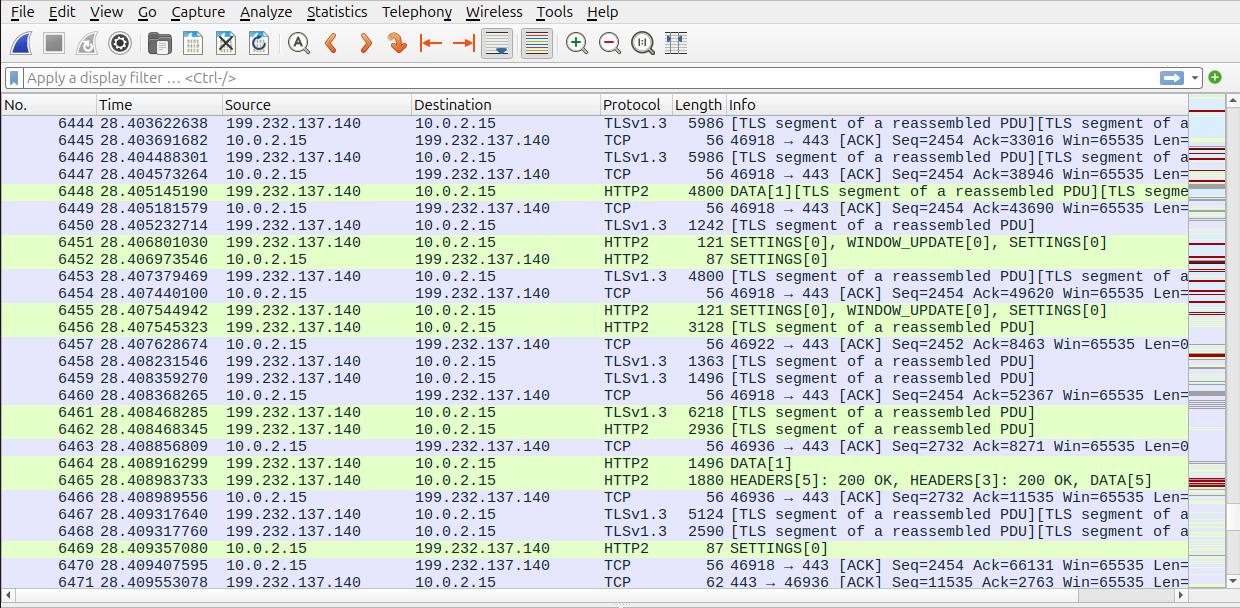
Part 4: Capturing and Analysing HTTPS Traffic#
Now you can begin capturing traffic.
Start a capture in Wireshark on your active interface (e.g.
wlan0,eth0)Launch the browser from your terminal:
google-chrome &
Visit any HTTPS website
If everything is working, Wireshark will automatically decrypt the traffic using the key log file. You should start seeing decrypted HTTPS content.
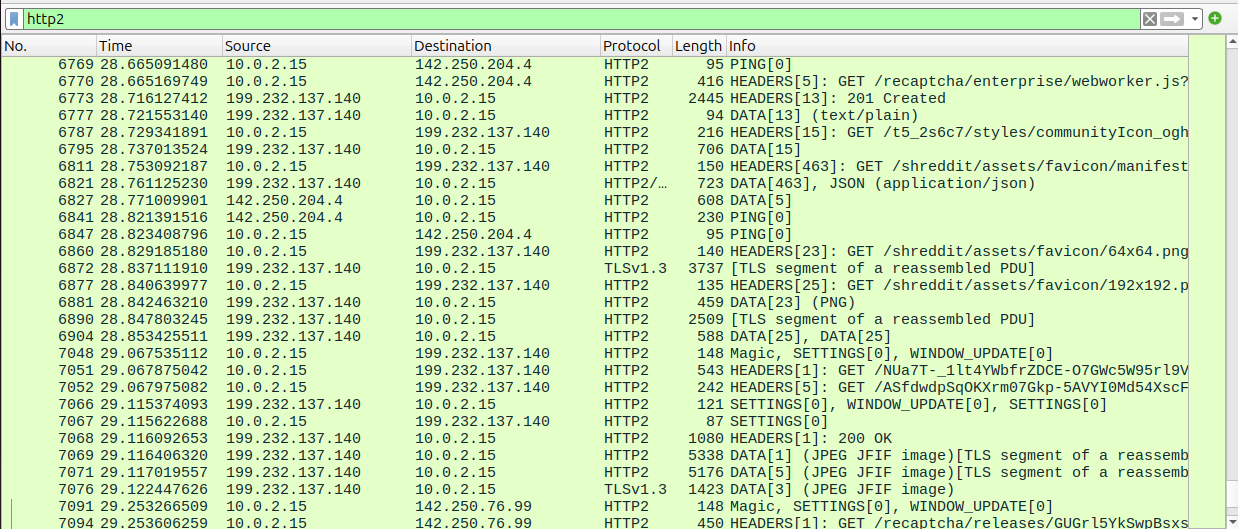
To filter just the decrypted traffic, use the following display filter:
http2
This will show you all HTTP/2 traffic, which is commonly used by modern websites. Here there is some entries for reCAPTCHA and Reddit, demonstrating that the HTTPS traffic is being captured and decrypted successfully.
Conclusion#
By using the SSLKEYLOGFILE method, you can decrypt and inspect HTTPS traffic in Wireshark without the need for proxies or custom certificates. This approach is especially useful for debugging browser-based network activity and analysing protocols like HTTP/2.
Key points to remember:
You must launch your browser from a terminal session where the
SSLKEYLOGFILEenvironment variable is set.If you used the temporary method, remember to set the variable each time you open a new terminal.
If you used the permanent method, the variable will be set automatically in all future terminal sessions.
This method does not work with Snap or Flatpak versions of Chromium or Firefox due to sandboxing restrictions.
The
.debversion of Google Chrome is recommended for the most reliable results.
With this setup, you can efficiently capture and decrypt HTTPS traffic for troubleshooting, learning, or protocol analysis on Ubuntu.