4 – How to Label Devices in Packet Tracer#
When building topologies in Cisco Packet Tracer, things can quickly get messy, especially as your network grows. Adding labels to your devices and connections helps keep everything organised. Labels can show IP addresses, VLAN numbers, trunk ports, or even device roles, making it much easier to follow and troubleshoot your design.
This tutorial will walk you through how to add labels to your devices and connections.
Step 1 – Open the Topology#
Begin by opening your Cisco Packet Tracer project file.
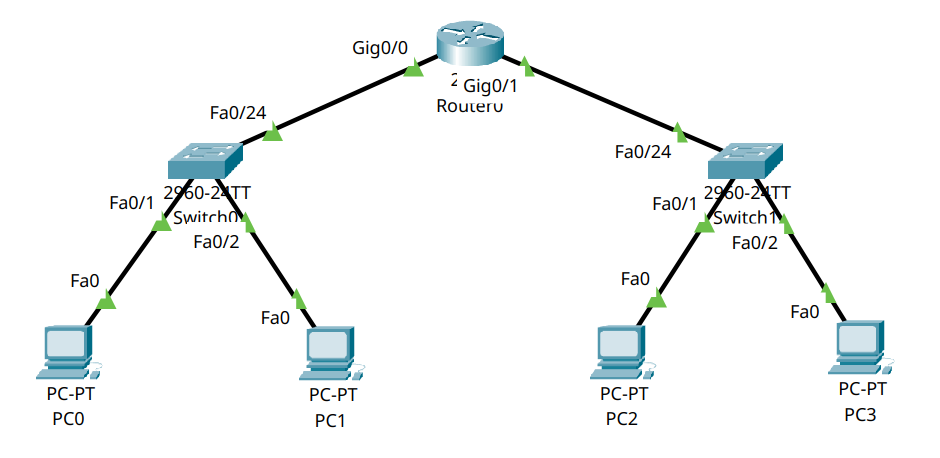
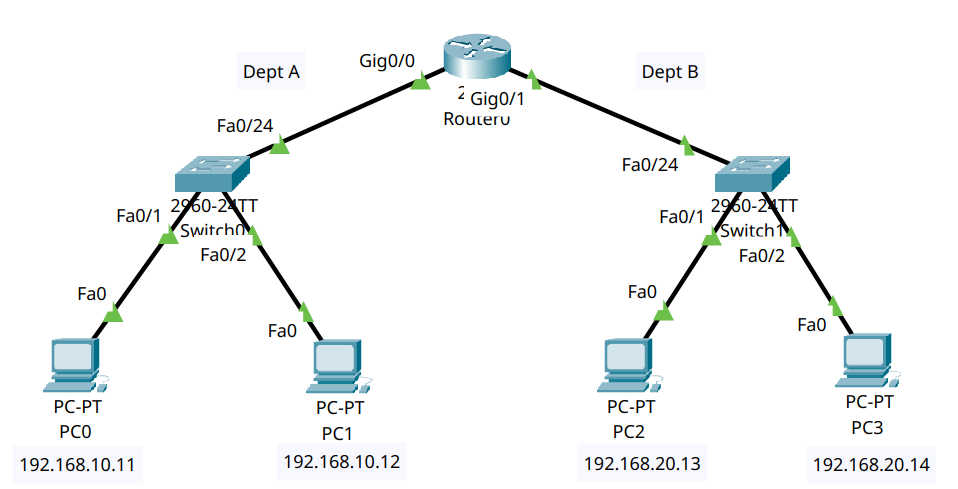
In this example, we have a small network (the one from Tutorial 4) with a router, switches and PCs.
Step 2 – Select the Text Tool#
In the second row of icons at the top of the Packet Tracer window, find the Text tool (it looks like a piece of paper).
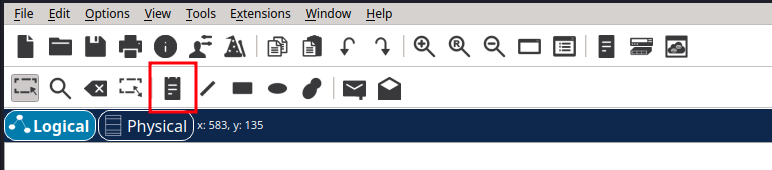
Then click anywhere in the workspace to drop a label.
Step 3 – Enter Your Label#
A small window will appear where you can type your text.
You might want to label things like:
IP Addresses e.g.,
192.168.10.1VLAN IDs or Names e.g.,
VLAN 10Trunk Links e.g.,
Trunk to SW2Default Gateway Info e.g.,
GW: 192.168.10.1
Once entered, click OK and the label will appear in the workspace.
You can drag it to reposition it near a device or link.
Step 4 – Move or Edit the Label#
To move or edit a label later:
Switch back to the Select tool (arrow icon)

Drag the label to a new position to move it
Or click on the label to edit its text
Step 5 – Use Labels to Improve Readability#
Here are some examples of how labels can be helpful:
Tip
Use labels to display key configuration info at a glance:
IPs on router interfaces
VLAN assignments on switchports
DHCP range for a subnet
Trunk connections between switches
This is especially useful during assignments, exams, or presentations, where readability is key.