8 - How to Add a Wireless Access Point to a Network#
This tutorial builds upon the network designed in Tutorial 4, where we implemented inter-VLAN routing using trunk links and subinterfaces. In this lesson, we’ll integrate a wireless access point into that existing network to support wireless clients without introducing a new routing layer.
We’ll demonstrate how to add and configure an AccessPoint-PT, attach it to an existing switch, and connect a wireless laptop that can communicate with the rest of the VLAN.
Find the CISCO pkt files in the repo -
Objectives#
Use an AccessPoint-PT instead of a wireless router
Extend Department B (VLAN 20) to include wireless devices
Configure wireless hardware manually in Cisco Packet Tracer
Assign static IPs to wireless clients
Verify intra-VLAN and inter-VLAN connectivity
Part 1 – Base Topology#
We will continue using the existing network from Tutorial 4. The topology includes:
Switch0 and Switch1 connected to a router (
Router0) using trunk portsPC0 and PC1 in VLAN 10
PC2 and PC3 in VLAN 20
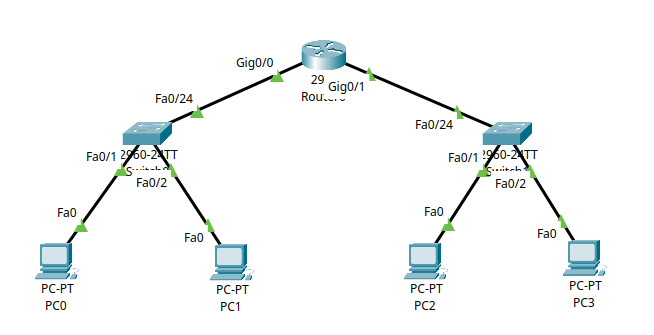
Our goal is to connect a wireless laptop to Switch1 (VLAN 20) using an access point.
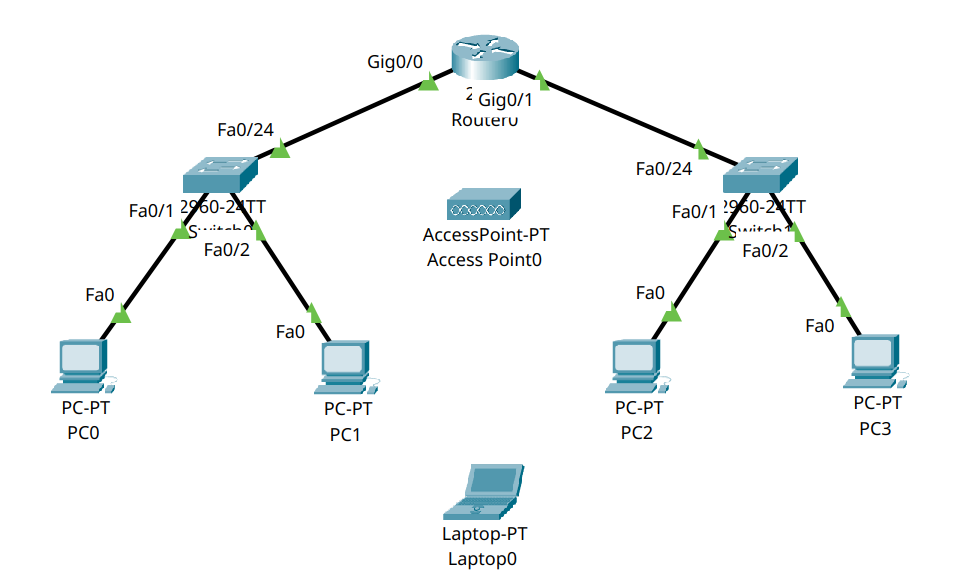
Part 2 – Adding the Access Point#
Step 2.1 – Place the Access Point#
Go to Network Devices > Wireless Devices.
Drag and drop an AccessPoint-PT onto the workspace.
Step 2.2 – Add a FastEthernet Interface#
By default, AccessPoint-PT does not have a wired Ethernet port, so we need to modify it:
Click on the AccessPoint-PT.
Navigate to the Physical tab.
Click the power switch to turn off the device.
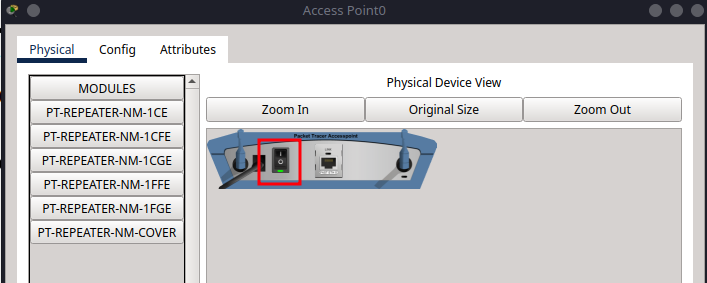
Remove the existing module (if any).
Install the PT-REPEATER-NM-1CFE module into the expansion slot.

Turn the device back on using the power switch.
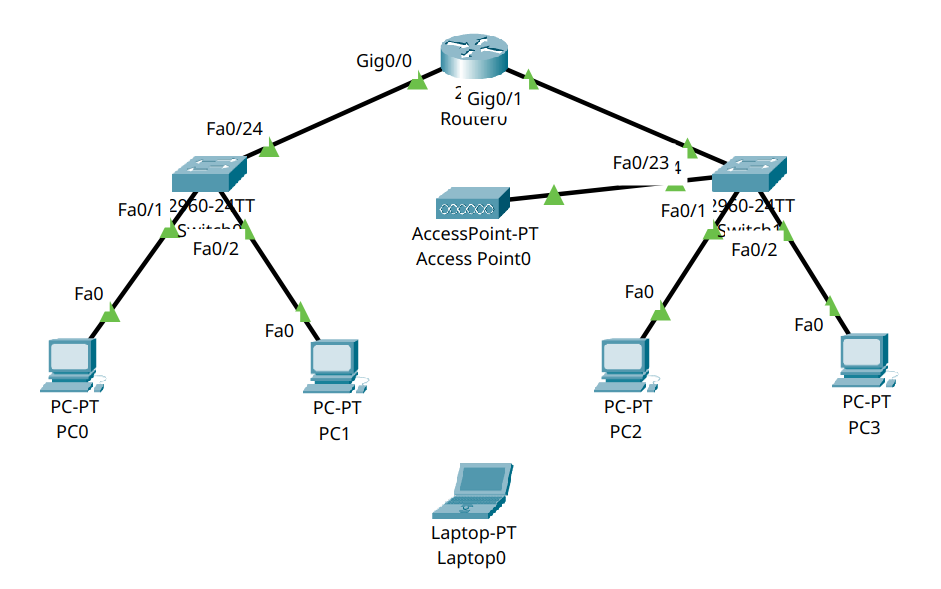
Step 2.3 – Connect Access Point to the Network#
Use a Copper Straight-Through cable.
Connect the Access Point’s FastEthernet0 port to Switch1 fa0/23.
This links the Access Point directly to VLAN 20, where PC2 and PC3 are already connected. If you followed the tutorial 5, then this port should already be configured with the correct VLAN settings.
Part 3 – Add and Configure the Wireless Laptop#
Step 3.1 – Add the Laptop#
Go to End Devices.
Drag and place a Laptop onto the workspace.
Step 3.2 – Install Wireless Adapter#
Click the Laptop.
Go to the Physical tab.
Power off the device.
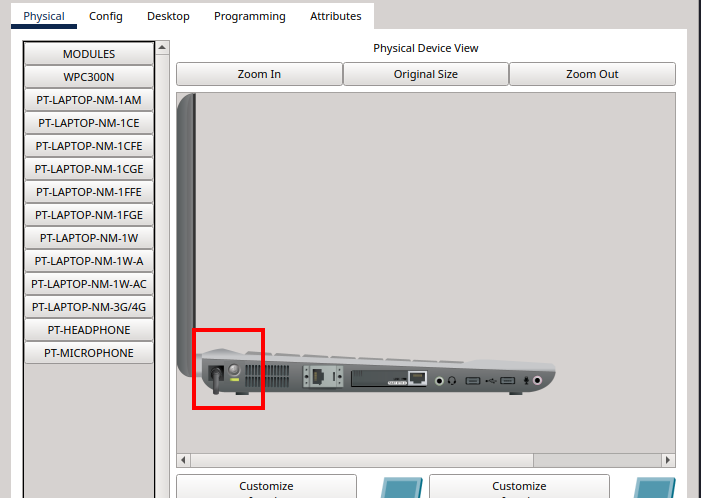
Remove the existing FastEthernet module (if present).
Add a WPC300N wireless card.

Power the laptop back on.
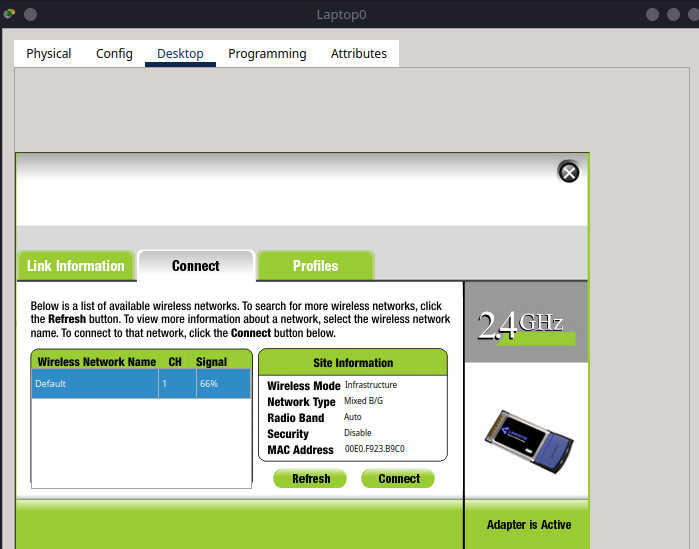
Step 3.3 – Connect to Wireless Network#
Open the Desktop tab.
Go to PC Wireless.
Click Connect to the SSID broadcasted by the Access Point.
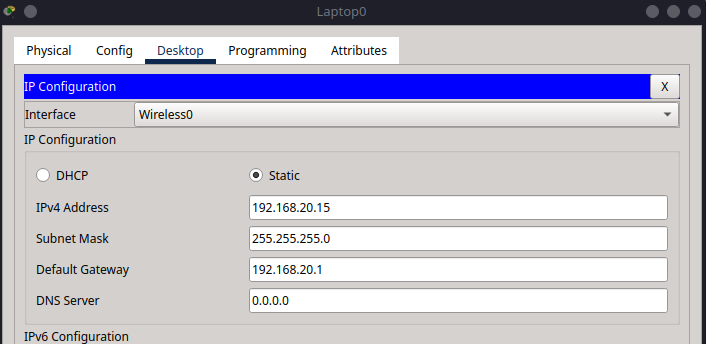
Part 4 – Assign Static IP to Wireless Laptop#
Because we are not using DHCP in this tutorial, assign the IP manually:
Go to the Desktop > IP Configuration on the laptop.
Enter the following values:
IP Address:
192.168.20.15Subnet Mask:
255.255.255.0Default Gateway:
192.168.20.1
This configuration places the laptop in the same subnet and VLAN as PC2 and PC3.
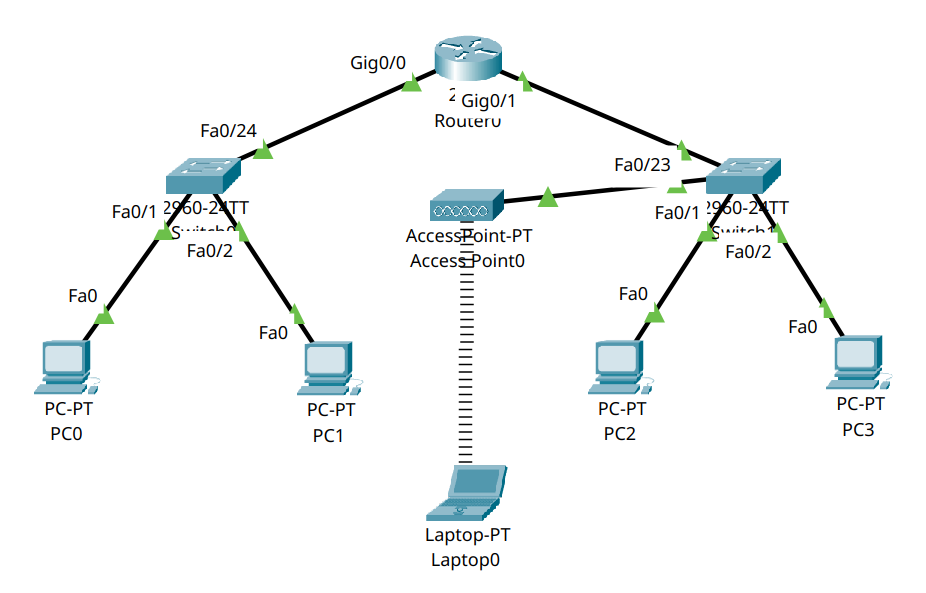
Your network should now look like this:
Part 5 – Verifying Wireless Connectivity#
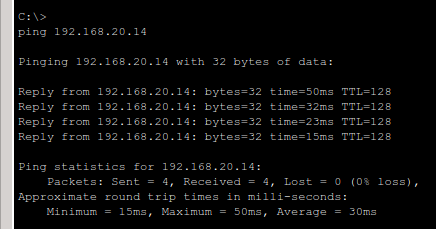
Step 5.1 – Ping a Wired Host in VLAN 20#
From the Laptop, open Command Prompt and type:
ping 192.168.20.14
This pings PC3. If successful, the laptop is correctly integrated into VLAN 20.
Step 5.2 – Ping a Host in VLAN 10#
Still on the Laptop, ping a host in another VLAN (e.g., PC0):
ping 192.168.10.11
If this succeeds, the router-on-a-stick configuration is working correctly and routing between VLANs.

Summary#
In this tutorial, you:
Added an AccessPoint-PT to an existing VLAN-based network
Installed a FastEthernet port into the access point to connect it to a switch
Configured a wireless laptop to join the VLAN and communicate with other devices
Verified both intra-VLAN and inter-VLAN connectivity
This setup demonstrates how to extend an enterprise VLAN structure to support wireless clients without compromising VLAN isolation or needing extra routers.