7 – Setting Up a Wireless Network in Packet Tracer#
This tutorial is the fifth in our Cisco Packet Tracer series, and it introduces wireless networking using the WRT300N wireless router. We’ll walk through setting up a Wi-Fi network, connecting devices wirelessly and via cable, and testing network connectivity.
Find the CISCO pkt files in the repo -
Creating a Simple Wireless Network with Cisco Packet Tracer#
In this tutorial, you will:
Configure a WRT300N wireless router
Connect two laptops wirelessly
Connect a desktop PC via Ethernet
Test connectivity using ping commands
This setup mimics a small home or office wireless network, helping you understand how wireless connectivity works in a practical scenario.
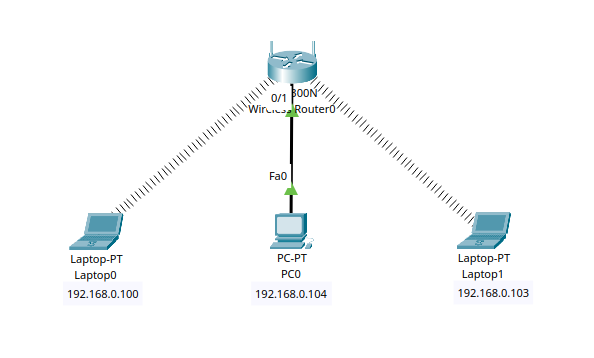
Part 1 – Understanding the Topology#
The network consists of:
A wireless router that acts as both switch and DHCP server
Two laptops that connect via Wi-Fi
One desktop PC connected via Ethernet
         ~ ~ ~ ~ ~ ~ ~ ~      ~ ~ ~ ~ ~ ~ ~ ~
        ~   LAPTOP0    ~    ~   LAPTOP1    ~
         ~ ~ ~ ~ ~ ~ ~ ~      ~ ~ ~ ~ ~ ~ ~ ~
              |                     |
              |     (Wireless)      |
              +---------+-----------+
                        |
                     WRT300N
                        |
                        | (Wired)
                      PC0
Part 2 – Device Placement and Cabling#
Step 2.1 – Place Devices on the Workspace#
From the Wireless Devices and End Devices section in Packet Tracer:
Place a WRT300N wireless router
Add Laptop0 and Laptop1
Add a generic PC (PC0)
Position your devices so the laptops are on either side of the router and PC0 is directly beneath, indicating a wired connection.
Step 2.2 – Connect PC0 to WRT300N#
Use a Copper Straight-Through cable:
Connect PC0’s FastEthernet0 to WRT300N’s Ethernet1
No cabling is needed for the laptops, they will connect wirelessly.

Part 3 – Configure the Wireless Router#
The WRT300N is both a DHCP server and wireless access point. We’ll set up both its wired LAN interface and wireless configuration.
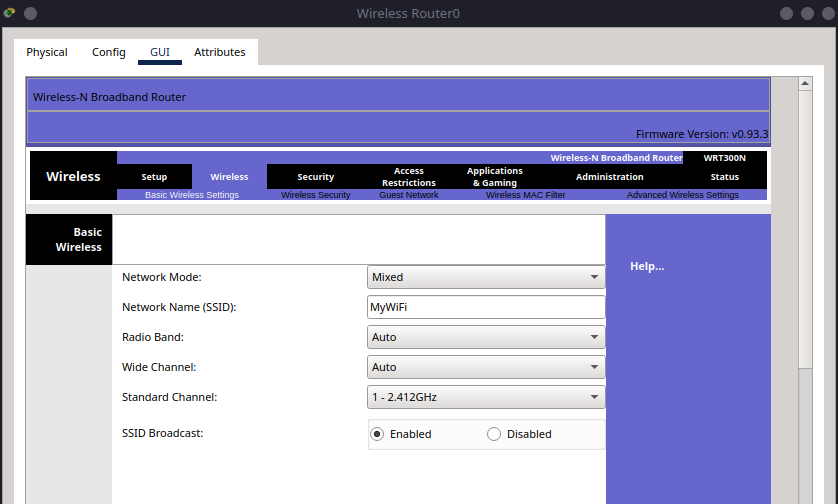
Step 3.1 – Set SSID#
Click on the WRT300N router.
Go to the GUI tab.
Under Wireless:
Network Mode: Mixed
Network Name (SSID):
MyWiFiChannel: Leave default
SSID Broadcast: Enabled
Note
A later tutorial will cover advanced wireless settings like channel selection and security protocols.
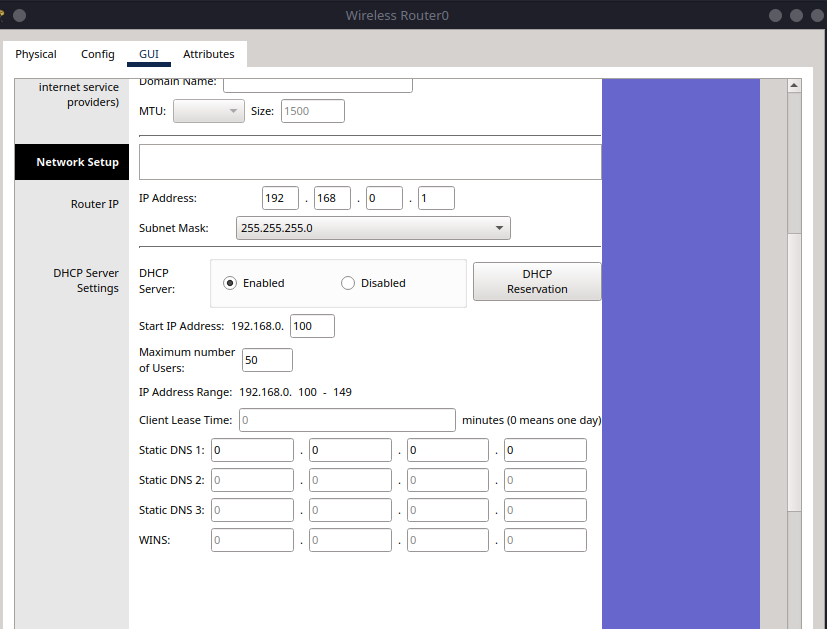
Step 3.2 – Verify DHCP Settings#
Still in the GUI tab, go to Setup > Basic Setup.
Confirm DHCP Server is Enabled.
Starting IP Address can remain default (e.g.,
192.168.0.100).
Part 4 – Configure Laptops to Connect Wirelessly#
Before connecting to Wi-Fi, each laptop needs to have a wireless network adapter installed.
4.1 Turn off the Laptop#
Click on Laptop0 (repeat later for Laptop1).
Go to the Physical tab.
On the laptop, click the power button to turn off the device (the green light will go off).
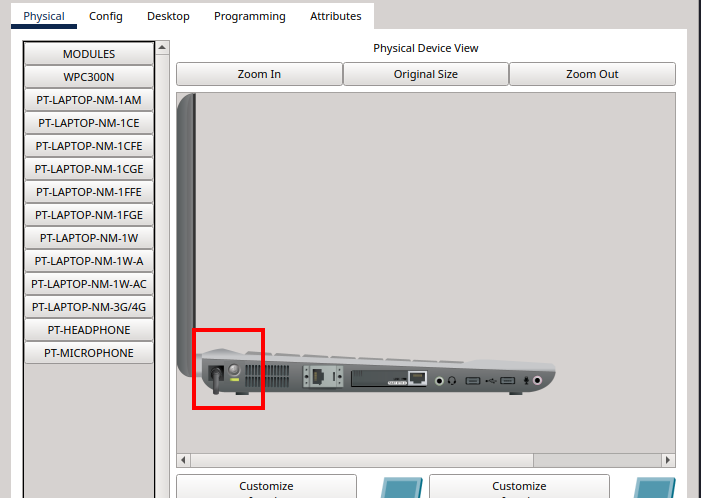
4.2 Replace the Wireless Module#
In the Modules list, find and drag the WPC300N module into the empty network slot on the right.
Remove any existing module (like FastEthernet) if needed to make space.
Once the WPC300N is installed, click the power button again to turn the laptop back on.

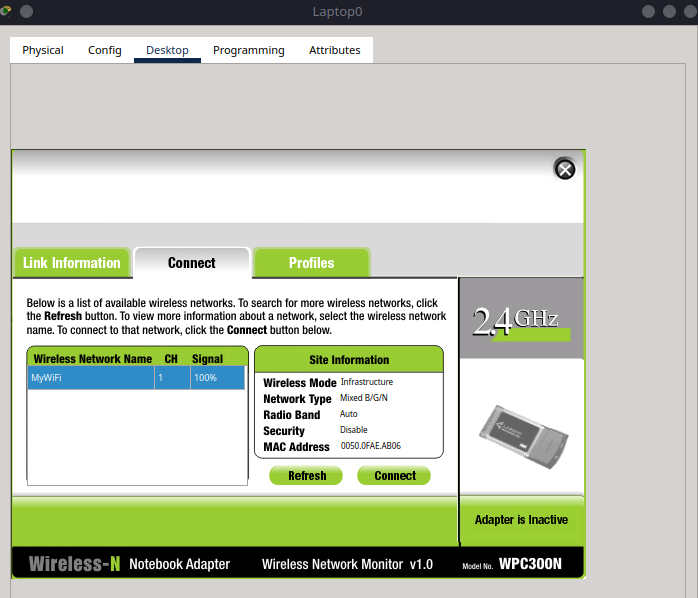
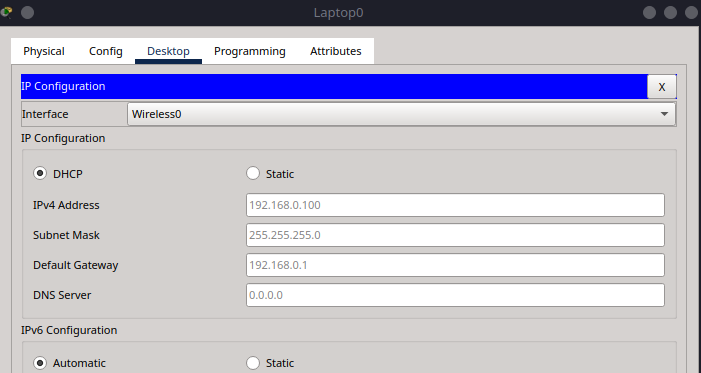
4.3 Connect to Wireless Network#
Now that the wireless card is installed:
Go to the Desktop tab → PC Wireless.
You should see a list of available networks.
Click Connect next to
MyWiFi.
After connecting, navigate to IP Configuration and confirm the laptop received an IP via DHCP (e.g., 192.168.0.100).
Tip
If the SSID doesn’t appear, click the “Refresh” button in the PC Wireless tab. Make sure the router is powered on and SSID broadcast is enabled.
Repeat these steps for Laptop1.
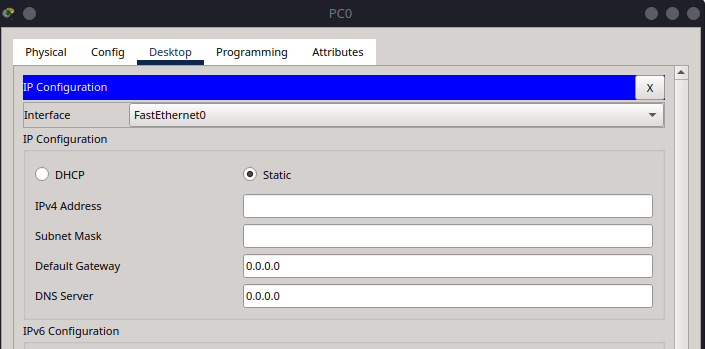
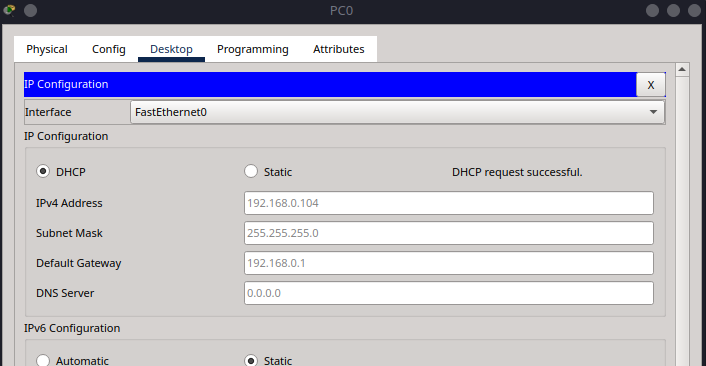
Step 4.4 – PC0 IP Configuration#
Click on PC0.
Go to Desktop > IP Configuration.
Select DHCP instead of static mode. You should receive an IP like
192.168.0.100or similar.
Part 5 – Verifying Network Connectivity#
We’ll test connectivity between devices using the ping command.
Step 5.1 – Check IPs of Each Device#
Make sure each device has an IP from the router:
Important
Your IP addresses may vary slightly based on DHCP assignments, but they should be in the same subnet (e.g., 192.168.0.x). So make sure you are using the correct IPs for your devices.
Device |
Connection |
IP Address |
Gateway |
|---|---|---|---|
Laptop0 |
Wireless |
192.168.0.100 |
192.168.0.1 |
Laptop1 |
Wireless |
192.168.0.103 |
192.168.0.1 |
PC0 |
Wired |
192.168.0.104 |
192.168.0.1 |
Mine ended up being like the above, so what I did was add the IP addresses as text into packet tracer, so I could see them easily.
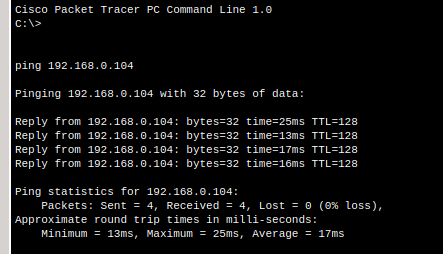
Step 5.2 – Test Wireless-to-Wired Connectivity#
From Laptop0, open the Command Prompt:
ping 192.168.0.104
You should see a successful reply from PC0.
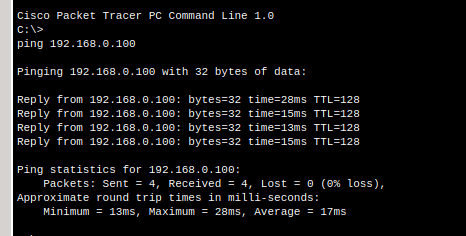
Step 5.3 – Test Wireless-to-Wireless Connectivity#
On Laptop1, ping Laptop0:
ping 192.168.0.100
Both devices should communicate successfully.
Step 5.4 – Test All Devices#
Finally, go to PC0 and ping both laptops:
ping 192.168.0.100
ping 192.168.0.103
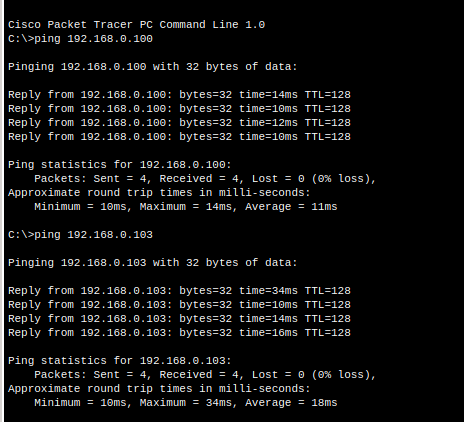
If all responses are successful, your wireless network is functioning as expected.
Troubleshooting
If pings fail:
Ensure the laptops connected to the correct wireless network
Re-check DHCP assignments in the router and end devices
Summary#
In this tutorial, you learned to:
Configure a wireless router (WRT300N) with DHCP
Connect laptops wirelessly using the PC Wireless utility
Connect a wired PC to the router using Ethernet
Verify connectivity using ping tests between wireless and wired devices
This setup introduces the basics of Wi-Fi networking and prepares you for future labs involving mobile devices, wireless encryption types, and wireless security in enterprise networks.